CLASS RESOURCES:
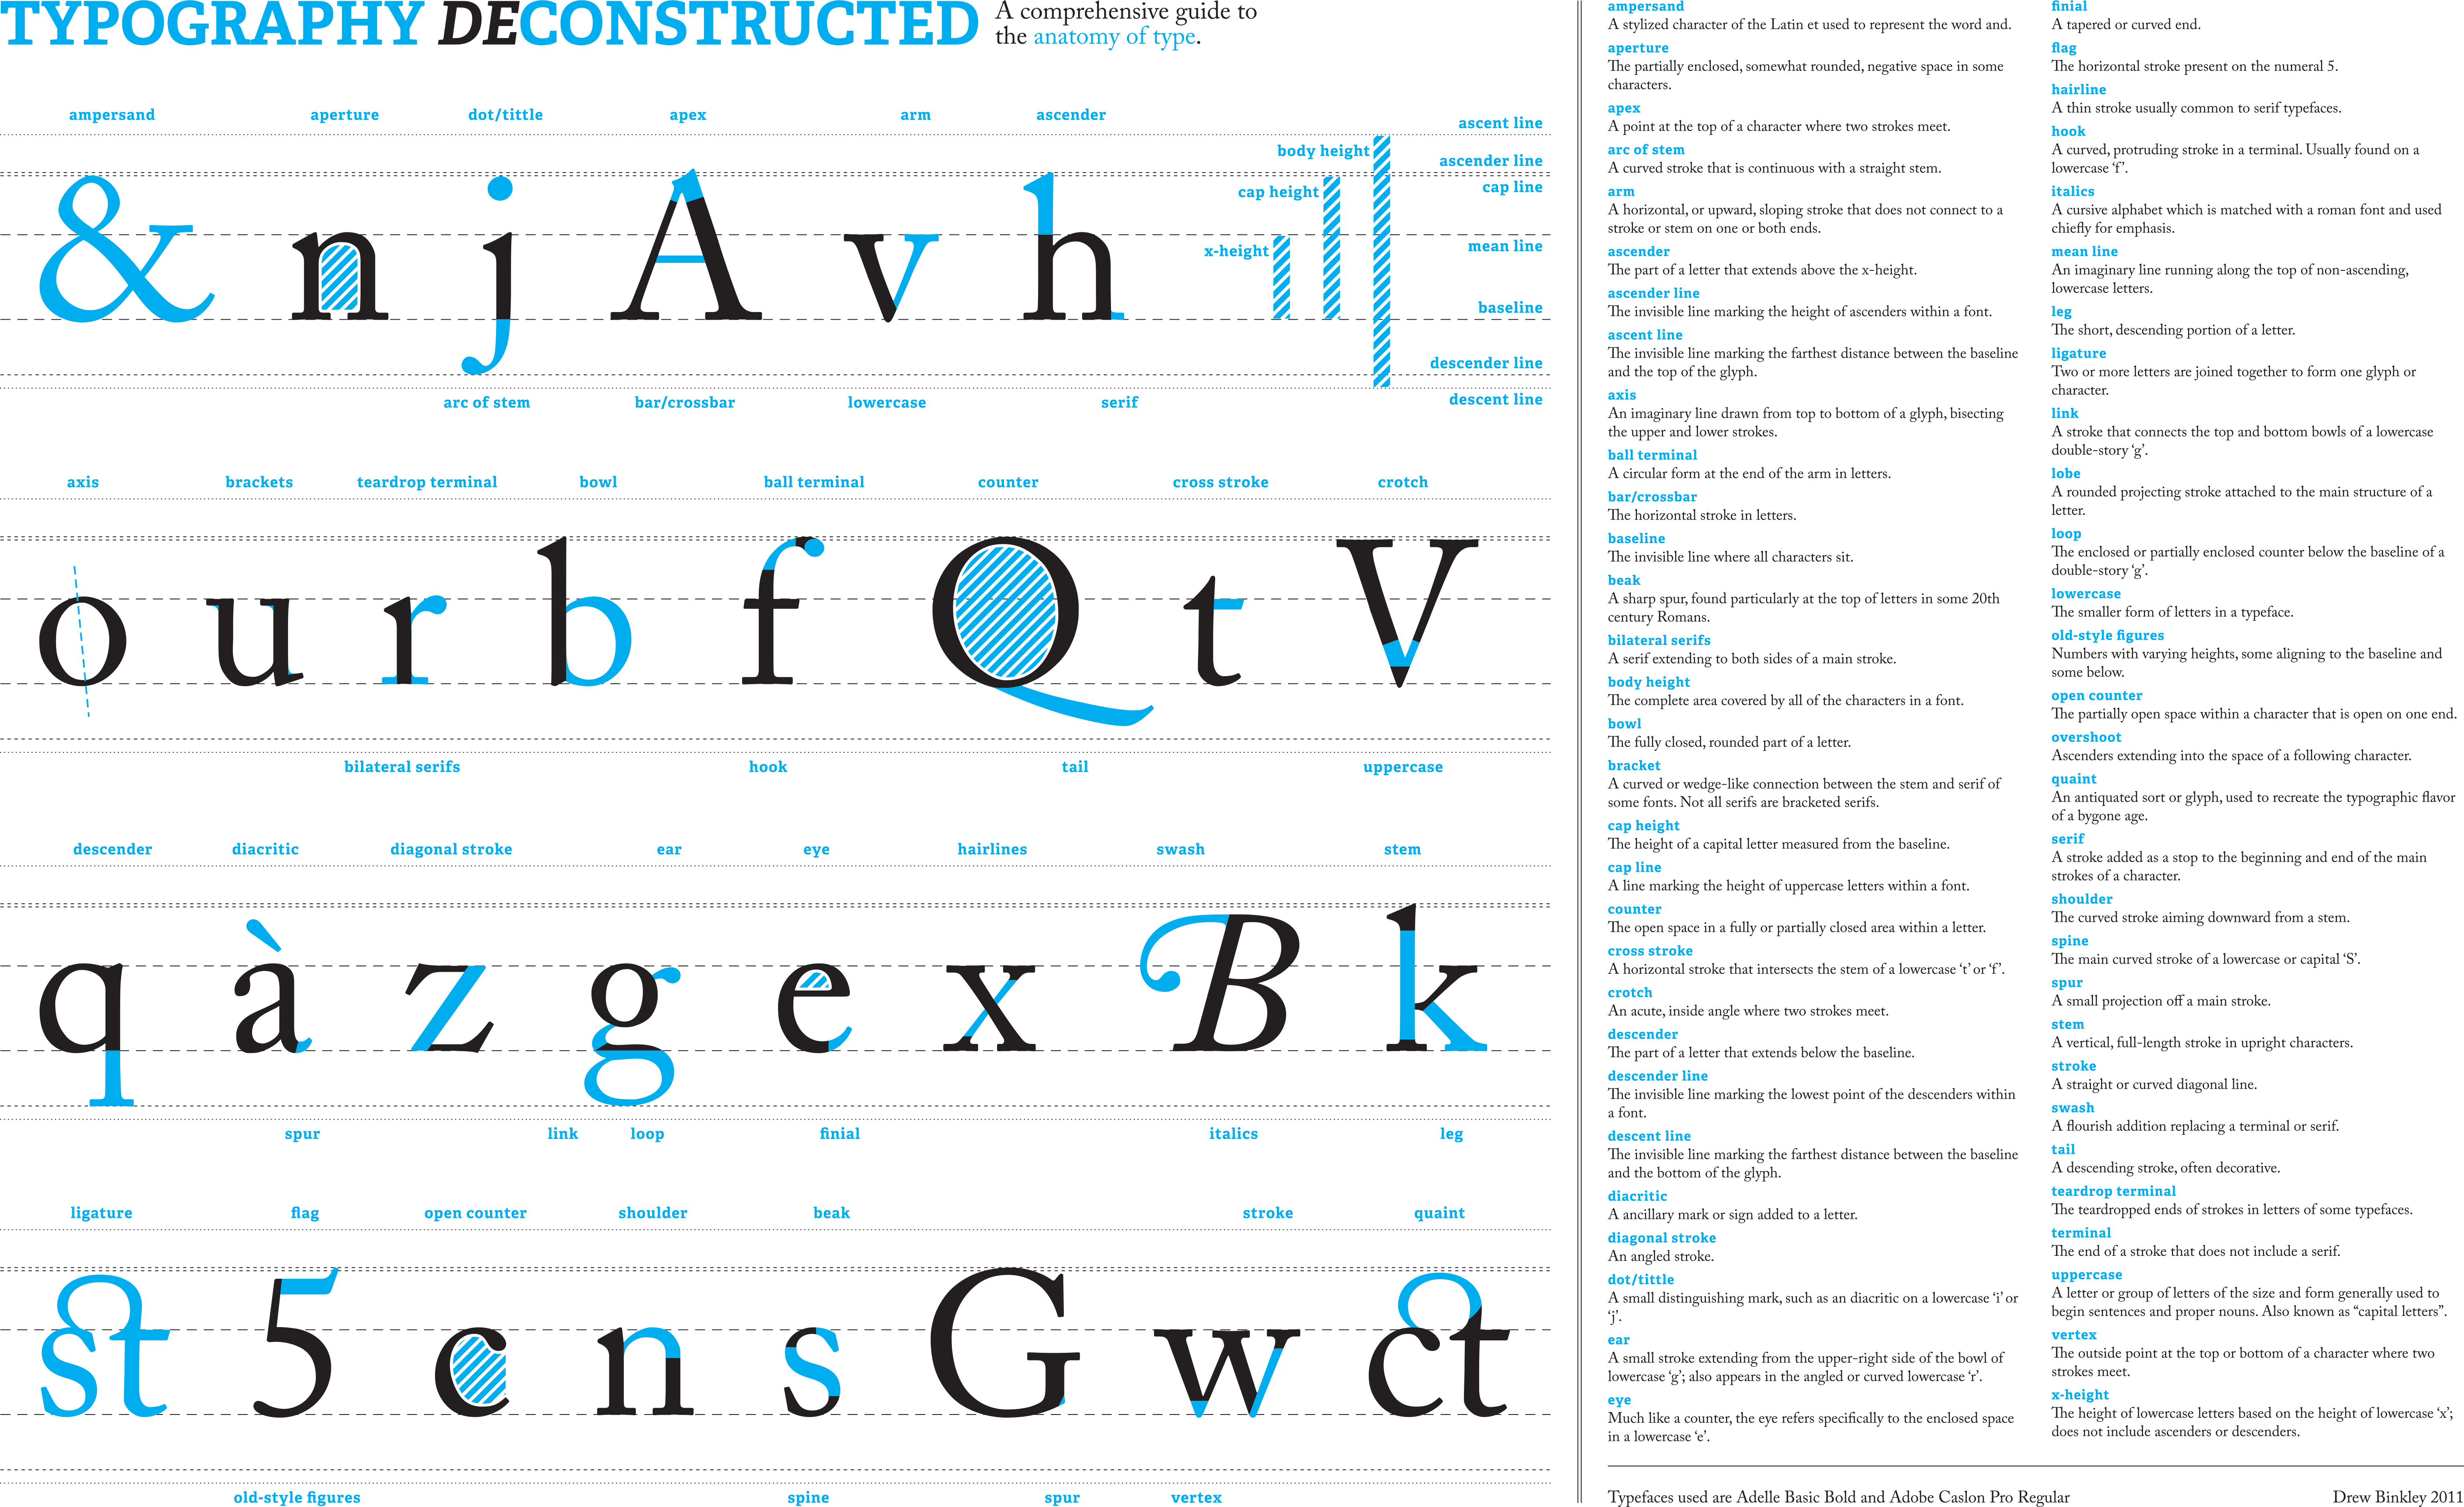
Type Classification and Anatomy- Type_Classifications_
Classic Typefaces –Classic_Typefaces
Illustrator Shortcuts
CMD+SHIFT and Arrows (next to M) to increase size of type
ALT + UP/DOWN change leading
ALT + RIGHT/LEFT change tracking
ALT + RIGHT/LEFT change kerning (when in between two letters)
ALT + SHIFT + UP/DOWN on word change baseline
Expressive Type Project
Expressive_Type_Project
Create 3 compositions using 3 different words. Use Illustrator’s tools and to explore/express the meaning of the word.
*Think about the appropriate font for the project.
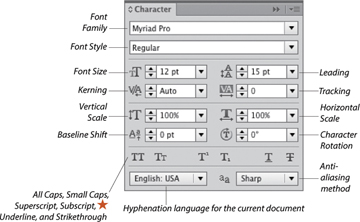
*Use Window>Type>Character to adjust the type settings
*Use Window>Type>Glyphs to add glyphs & ligatures
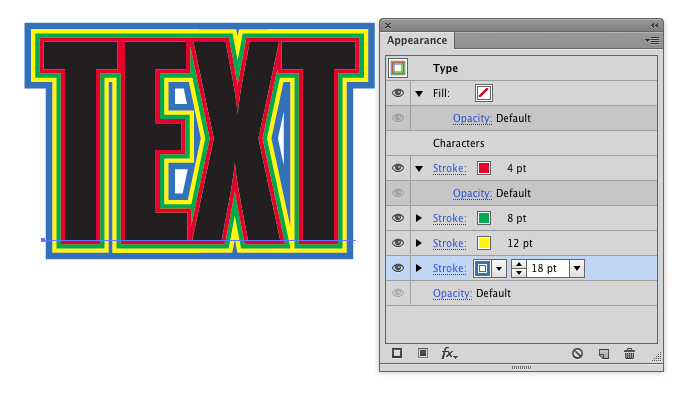
*Use Window>Appearance to experiment with multiple fills, strokes and effects.
*Use Window>Swatches to experiment with imported textures *Use brushes – blob and art and calligraphic
*Create 3 artboards in one illustrator file
*Save the project as Lastname_Expressive_type.ai for your records
*Save the project as Latname_Expressive_type.pdf and upload to google classroom.
Project 4 – Logo Re-Creation
Find a logo for a Movie, TV Show, Video Game, Clothing Brand, Food Brand, etc.
Use the Pen & ShapeTools, Pathfinder and Create Outlines to trace/copy the logo.
When you are done re-creating the logo, create the logo in 3 different color ways.
1. Black & White
2. In Color similar to the original
3. In an different color than it usually appears
Save this file as Lastname_Logo_Recreation.ai
and turn into Google Classroom
Classwork 2:
Use the Pen tool & Shape tool to create the letters of your first name.
Type your name in a SERIF font, lock this layer.
Create a new layer and use the PEN TOOL or Shape Tools/Pathfinder to recreate the shapes of the letters.
When you are done take your trace and put it below the original type layer.
Save the file as an .ai (illustrator format) and turn into Google Classroom.
Label the file Lastname_Text_trace.ai
In Illustrator, use Window>Appearance to add multiple strokes and effects to your type or shapes.
Illustrator Pen Tool Basics:
Download the following images to your desktop.
Create a new document in Illustrator > File > New > Letter Size
Place the images into your new Illustrator Document
Use the PEN Tool to complete these exercises!
Classwork 1:
Collect 20 images of different typefaces.
You can take pictures with your phone or take screenshots (command+shift+4)
Look at the typefaces you see in your clothes, on products, on signs, on logos, etc. Decide which category each logo belongs to:
Serif, Sans-serif, Blackletter, Script, Display/Decorative
Collect all 20 images and the classification in one illustrator document, export to JPEG when you are done.
Name this project Lastname_TypeClassification.jpg
Extra Credit Project:
Design a poster that has the following words “Glendale Unified School District College and Career Fair.”
Size of the document will be 144 inches x 48 inches.
Save in Illustrator format and PDF
*This document contains more information so you understand the context of this project
College & Career Fair Flyer 2018
NOTES & LINKS:
Type Classification Examples and History – http://www.designingwithtype.com/cooper0/index.html
Serif Overview – https://en.wikipedia.org/wiki/Serif
Old Style Serif https://en.wikipedia.org/wiki/Category:Old_style_serif_typefaces
Transitional Style Serif https://en.wikipedia.org/wiki/Category:Transitional_serif_typefaces
Modern Style Serif https://en.wikipedia.org/wiki/Category:Modern_serif_typefaces
Slab Serif https://en.wikipedia.org/wiki/Category:Slab_serif_typefaces
Adobe Typekit, interactive site with category selector- https://typekit.com/fonts
Typography History with Examples- http://ilovetypography.com/2007/11/06/type-terminology-humanist-2/
More information about type families –http://www.fonts.com/content/learning/fontology/level-1/type-families
Detailed Type Anatomy & Glossary – http://www.typographydeconstructed.com/
In Illustrator, use Type > Character to adjust the type settings.


