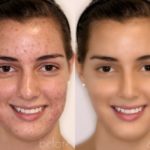
COLOR CORRECTION:
1. In Photoshop, File>Open the image you found on google.
2. CROP the image if necessary. Use the CROP tool and choose the area you want to keep, whatever you don’t select will be deleted. Then press RETURN/ENTER.
3. To adjust the colors in the image you can use IMAGE>ADJUSTMENTS>COLOR BALANCE. Slide the colors in the different directions to change the color settings.
You can also use IMAGE>ADJUSTMENTS>LEVELS to bump up the contrast.
4. You can also use IMAGE>ADJUSTMENTS>HUE&SATURATION. 5. Change the color of an object in the image. Make a selection around part of the image, using the MARQUEE SELECTION TOOL. 6. Now copy the selection to a new layer EDIT>COPY and the EDIT>PASTE.
7. In the new layer make a selection around the object again, using MARQUEE SELECTION.
8. Now go to IMAGE>ADJUSTMENTS>REPLACE COLOR, use the eyedropper to select the color you want to change, the object you want to change should turn white in the color range preview window. Change the color of the object in the bottom window.
Press Ok.
10. Now Flatten your document, LAYER>FLATTEN IMAGE.
11. Save this file with a new name, such as Version2, etc. Now Open a new document. FILE>NEW and choose LETTER from Presets.
12. In this new document drag your finished version. Grab the MOVE TOOL (Black Arrow) and drag your image into your new document. 13. Now open the original (un-edited version) of the document and drag this to your new document as well.
14. Save this new document as Myeditedimage.psd in your folder.OPTION 2:
Retouching:
1. In Photoshop, File>Open the image you found on google.
2. Make a duplicate of the layer, by right-clicking on the layer in the layers palette and choosing DUPLICATE LAYER.
3. Now use the HEALING BRUSH, SPOT HEALING BRUSH, PATCH TOOL or CLONE STAMP TOOL to take away any problems. When using the HEALING BRUSH or CLONE STAMP TOOL, use the ALT/ OPTION KEY to select the area to copy from.
4. Now Flatten your document, LAYER>FLATTEN IMAGE.
5. Save this file with a new name, such as Version2, etc. Now Open a new document. FILE>NEW and choose LETTER from Presets.
6. In this new document drag your finished version. Grab the MOVE TOOL (Black Arrow) and drag your image into your new document.
7. Now open the original (un-edited version) of the document and drag this to your new document as well.
8. Save this new document as Myeditedimage.psd in your folder.
Retouching a portrait:
EDIT FACE/PIMPLE PROJECT using Blur and Layer Mask
1.Duplicate the Background Layer. 2.Call it BLUR LAYER
3. Filter>BLUR>Gaussian Blur, Make it very blurry 4. Add a Layer Mask
5. Get your brush
6. Choose a Soft Edged, 35pt
7. Choose BLACK for your Foreground Color 8.Paint over her eyes, nose, mouth
9. Use different size brushes and change the opacity of the brush to
make the details of the face visible.
10. As you finish you can lower the opacity of the entire layer to make it look more realistic.


